How to Center Clay on the Wheel: A Step-by-Step Guide for Beginners
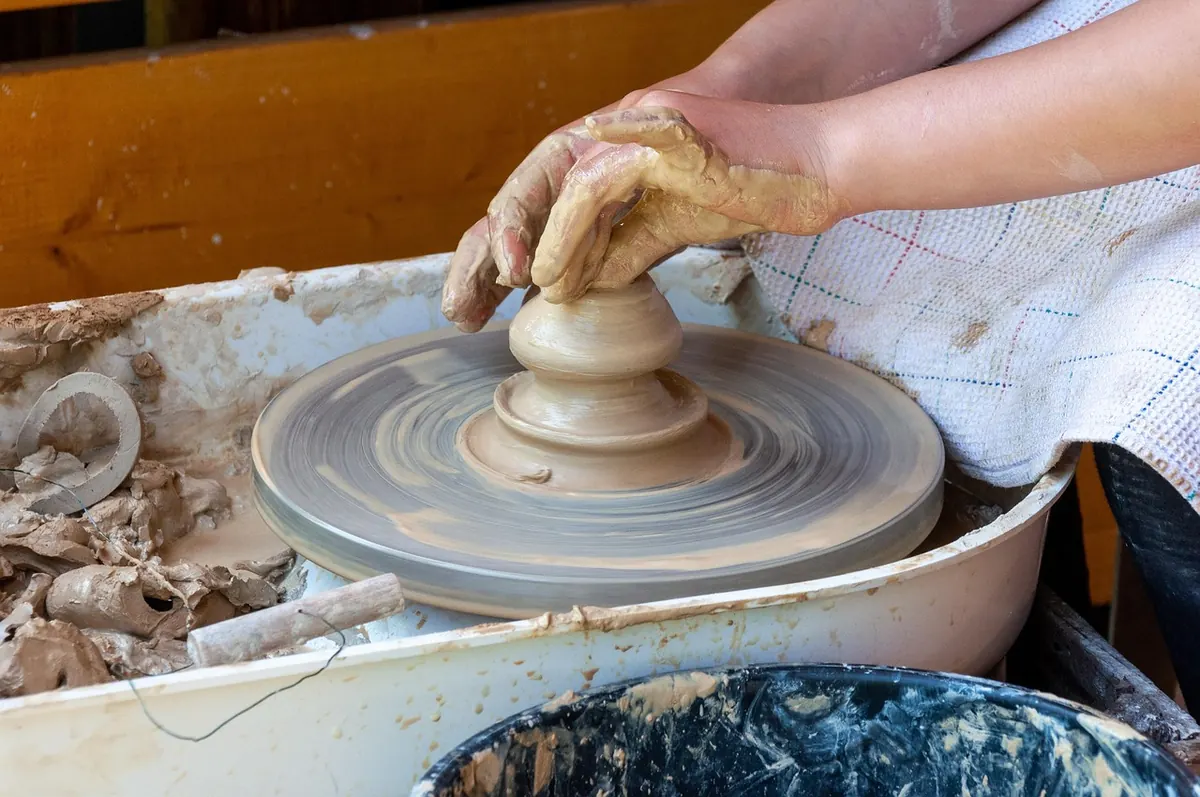
Every pot begins with a lump of clay that refuses to behave. It lurches, it leans, it throws a moving shadow under your hand that tells you something is wrong. Then, for a few seconds, it goes quiet. That quiet is centering, and it is the moment most beginners chase for weeks. The good news is that centering is not a talent you either have or don't. It is a set of physical habits — preparation, wheel speed, and where your elbows are — and once those habits settle in, the clay stops arguing with you.
Start with the clay, not the wheel
Most centering problems begin before the wheel is switched on. Clay that comes out of the bag is rarely uniform: the outside dries faster than the middle, and a bag that has been stacked for months can hide hard, dense patches. Wedging fixes both.
It does two jobs at once. It evens out moisture through the whole mass, and it pushes out the larger air pockets that later turn into blowouts or a wet "burp" halfway through a pull. Spiral wedging — pressing the clay forward and rolling it back in on itself — works well for soft, plastic stoneware. Ram's head wedging, where you slam the clay down and press with the heel of your hand, suits firmer bodies and is faster once you have the rhythm.
Whichever method you use, work the entire lump rather than just the outside. A simple check: cut the ball in half with a wire and look at the cross-section. Dark, dense swirls sitting next to pale patches mean you have more to do. For a ball around one kilogram, several minutes of steady wedging is a sensible habit — less for small pieces, more for clay straight from a cold bag.
By the end, the clay should dent under your thumb without collapsing, and hold its shape when you press a thumb into it. Too soft and it will flop and slide; too firm and you will fight it on the wheel all afternoon.
Setting up the wheelhead and your body
Slam the wedged ball down slightly off-center toward the front of the wheelhead, then strike it with a flat palm to compress the base into a rough dome. A wheelhead that is barely damp gives you grip; a puddle underneath gives you a puck that spins away at the worst moment. If the clay keeps letting go, dry the head, wipe the clay's base, and slam again with more commitment.
Your seat matters more than most people expect. Sit so the wheelhead is roughly level with your hip crease and your elbows can rest against your thighs without hunching or reaching. Take off rings, watches, and anything that dangles. Keep a sponge within reach, and keep your nails short — the wheel is unforgiving about long nails pressing into clay.
Find the wheel speed before you touch the clay
Centering wants speed. A common beginner error is setting the wheel to the slow, gentle pace used for opening and pulling, then pushing harder and harder to compensate. The clay drags against your hands, your wrists take the strain, and nothing gets round.
For centering, set the wheel fast enough that the clay hums steadily under your palms — quick, but not a blur. You want the clay to feel like it is meeting your hands rather than resisting them. As a rule of thumb: fast for centering and coning, slower for opening, slower still for pulling walls, and slower again for shaping a rim.
Leave the speed dial alone while your hands are on the clay. Lift off, adjust, then return. Changing speed mid-press introduces exactly the wobble you are trying to remove.
Hand positions that actually work
You are not gripping the clay with your fingers. You are bracing it between your arms and the wheelhead. The heel of the hand — the firm pad below the little finger — is the working surface, and the power comes from your shoulders, not your knuckles.
Sit square to the wheel. Rest your left forearm against your left thigh or hip, heel of the hand on the left side of the mound, fingers wrapping toward your body. Bring the right hand over the top of the clay, heel pressing down and inward, fingers draping over the far side, right forearm braced against the right thigh. Both hands press toward the center line at the same time, continuously, not alternately.
Water is a lubricant, not a tool. Wet your fingertips, not your palms, and only when the clay starts to drag. If the surface shines, you have used too much — a wet mound is a slippery mound, and slippery clay cannot be centered.
The cone and return, step by step
- Dampen your hands lightly and press both heels down and inward to seat the base.
- Bring the right hand over the top and push down while the left hand supports the side, driving the clay up into a cone.
- Press back down with the heels of both hands, flattening the cone into a dome.
- Repeat three to five times, keeping the pressure symmetrical and your forearms anchored.
- On the final pass, come down slowly and finish with a level top and an even, rounded shoulder.
Coning up and down is not decoration. It aligns the particles inside the clay, works out small inconsistencies, and gives your hands repeated chances to feel where the mass is off-center.
How to know it is centered
- No shadow moves under your hand as the wheel turns.
- The hum of the clay is steady, and the surface goes smooth and slightly tacky.
- Concentric rings appear when you touch the top lightly with a wet finger.
- You can rest a fingertip against the side without being bumped.
- The clay stops pulling at your palm — it simply rotates under it.
Troubleshooting common centering problems
The mound wobbles, then seems fine, then wobbles again. Your hands are drifting or your elbows are lifting away from your body. Bring the clay to your hands rather than reaching for it, and check that both forearms are still braced.
The clay keeps sliding off the wheelhead. Usually too much water underneath, or clay that is too soft for the pressure you are applying. Dry the head, re-slam the ball, and direct your force inward and slightly down instead of sideways.
Hands skid and the clay feels uncontrollable. Over-wet. Blot the surface with a sponge, dry your hands, and drop the speed a notch. Adding more water will only make it worse.
One spot bumps your hand on every revolution. The ball was off-center to begin with or has a hard patch from rushed wedging. Cut it open to check, re-wedge, and start again — it is faster than fighting it.
Fingers and forearms ache after ten minutes. You are gripping with your fingers. Relax them, widen the contact to the heel of the hand, and let your skeleton do the work.
The hole goes off-center the moment you open. Nine times out of ten the mound was not truly centered. Recenter before opening rather than trying to correct it later; a wobble you ignore at this stage comes back at the rim, when the wall is thin and much harder to rescue.
A practice routine worth repeating
Weigh out five small balls — around 500 grams each — and spend a session doing nothing but centering. Center, cone up and down three times, then wire the ball off the wheelhead without opening it. No pots, no pressure, no temptation to rush ahead. Repeat until centering feels boring.
Try a few of them with your eyes closed for the first thirty seconds. It sounds odd, but it forces you to read the clay through your hands instead of your eyes, and most people feel an off-center mass sooner than they see it. Work at a pace where you could hold a conversation, and stop when your shoulders tighten.
Expect this to take a few weeks of regular practice rather than a single afternoon. That is normal, and it is not a sign that you are behind. Keep the balls small, keep the wheel fast, keep your elbows locked in, and the quiet moment will come more often — until eventually it is simply how the clay feels when you sit down.
Photo: wal_172619 / Pixabay